


To make your own build in Dota 2, open the Heroes section in the game client, go to Guides and click Create. Then pick a hero, drag items from the shop into groups for each stage of the match, fill in the starting items, set the ability and talent order, and click Save. Your build then sits at the very top of the guide list during hero selection and is available in the shop during the game. Each step is covered in detail below, followed by tips on putting together a build that actually works.
There are a few reasons to create a build of your own. Most players do it to:
Find the item combination that gets the most out of a particular hero's abilities.
Make the game easier: with a build at hand, you don't have to think mid-fight about which item to buy next.
Share their approach with the community and get feedback from other players.
Experiment with unusual builds just for fun.
Step-by-Step Guide (Part 1)
Everything is done inside the Dota 2 client, with no third-party programs or websites. Outside "build makers" will at best waste your time, since they may be made for old patches, and at worst their files and links may be unsafe. The built-in editor guarantees that your guide works in the match and reflects the items actually in the shop.
The feature is free and available to every player for every hero without restrictions.
Launch Dota 2 through Steam. Once it loads, find the Heroes section at the top of the screen, and inside it the Guides tab, which is also at the top.
A few buttons appear at the bottom. Click Create to open the full list of heroes, then choose the one you are building for. If you haven't settled on a hero yet, our overviews of all Dota 2 heroes and easy heroes for beginners can help.
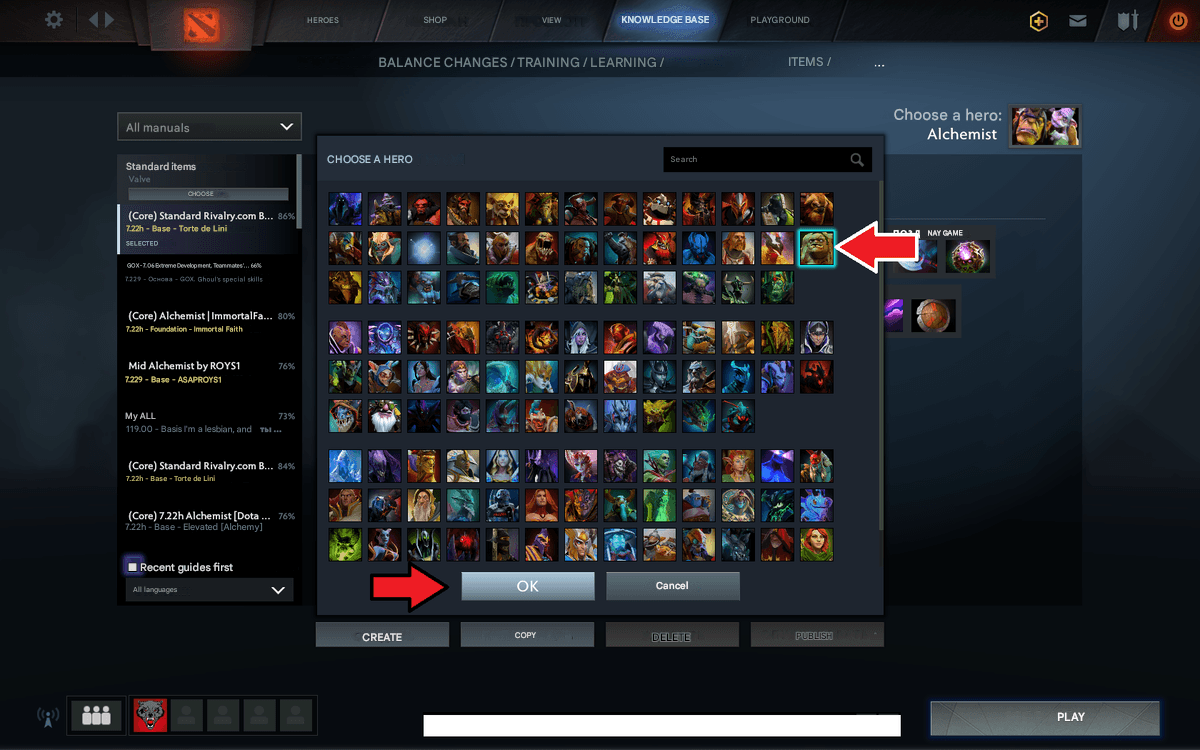
Step-by-Step Guide (Part 2)
Once you click the hero, its icon and name appear in the upper left corner of the screen. Then follow these steps:
Select the role you are building for, such as offlane, roamer or support. This makes the guide easier to find among others. Our article on Dota 2 hero positions explains how the roles differ.
Always fill in the Guide Name field with a clear name, otherwise the build will be hard to find in the guide list when you need it. A good habit is to include the role and the core idea, such as "Damage mid" or "Save support."
Under the hero's name you will see groups that items are dragged into. You can rename the groups, but their names usually follow the stages of a match: starting, early, mid and late game.
Hold the left mouse button on an item in the shop and drag it into the right group. Repeat until every stage of the game has its own set of items.
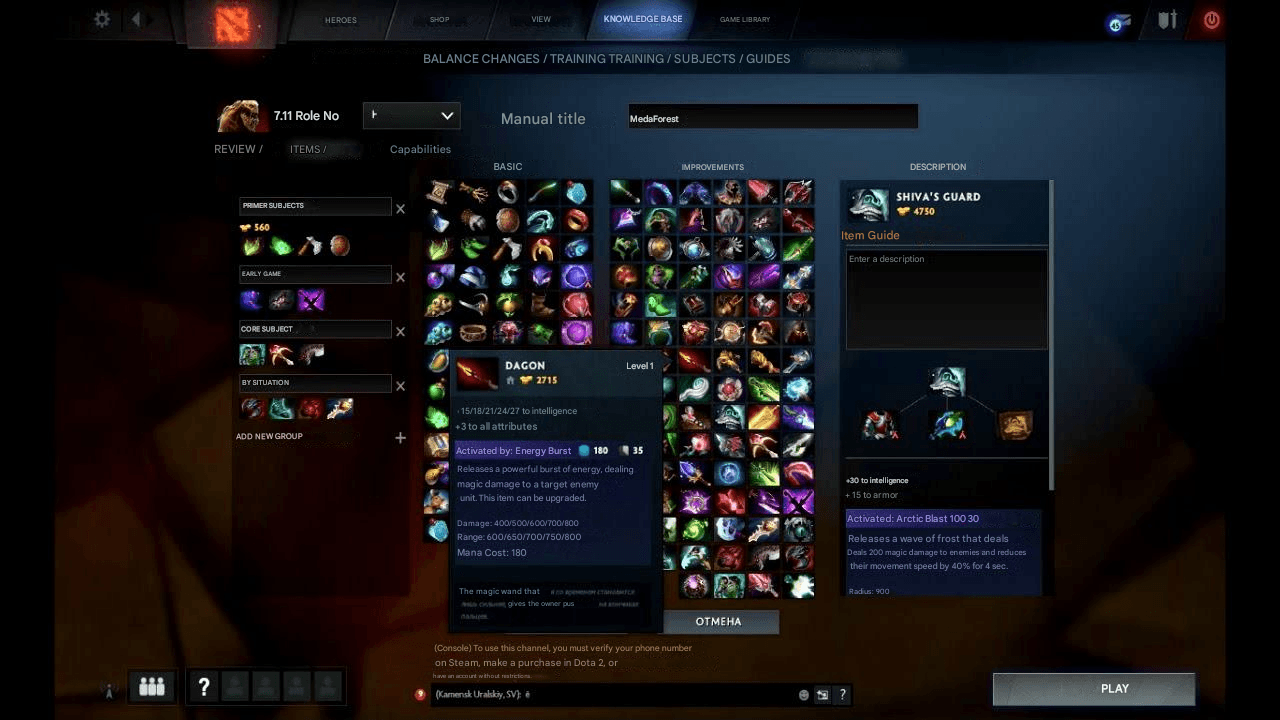
Step-by-Step Guide (Part 3)
Everything above happens in the Items tab, which opens by default after you choose a hero, but the editor has other tabs too. The Starting Items section holds the opening purchase, the items you buy at the very start of the match, and you fill it the same way as Items.
The last tab, Abilities, deserves a closer look, because it largely decides how useful the build will be. It lists the hero's abilities, each with a leveling bar next to it. On that bar you decide at which hero level each ability gets a point.
Below the abilities is the Talent Tree. At four levels you choose one of two talents, and your job is to decide which talents to take and in what order.
When the talents are set, click Save, and the build is done. If you want other players to see it, also click Publish: the guide will appear in the public list, where others can rate and select it.
How to Learn to Make a Good Build Yourself
It isn't hard; all it takes is time and a willingness to learn the game. A few recommendations:
Play a series of matches with one hero and don't switch between characters. You will get a better feel for the hero's strengths and weaknesses, especially if you try different builds from other players and compare the results. After 100 or 200 matches on one hero, you will know which item set suits it best.
Before writing your own build, study ready-made guides, starting with the highest rated ones. Think about what the author was counting on, what they wanted to strengthen in the hero and what they left out. If the answer isn't obvious, play at least one match with that build; a lot becomes clear in the game itself.
Learn how items work and how they interact: which ones strengthen each other and which ones overlap and weaken the build.
Keep the hero's Facets in mind. They are chosen during the draft and change how abilities work, so the same build can perform differently depending on the Facet. It helps to note in the name which version of the hero the build is meant for.
Test the build in practice. The most convenient place is your own lobby, where you can calmly check the timings of key items. In regular matches, steady last hitting matters just as much: without gold, even a perfect build won't come together on time.
Activate Your Own Build Before the Match
Once your build is ready (or several of them), it's time to try it out.
Find a match in any mode, join it and pick a hero. While the strategy phase is still running, open the Guides tab at the top of the screen and click your build. Guides you created always sit at the top of the list.
There is a second way as well. Find a match and pick a hero in the same way, wait for the game to start, open the shop and click All Builds in its upper left corner. Choose your build from the list, and the purchase suggestions will appear right in the shop.
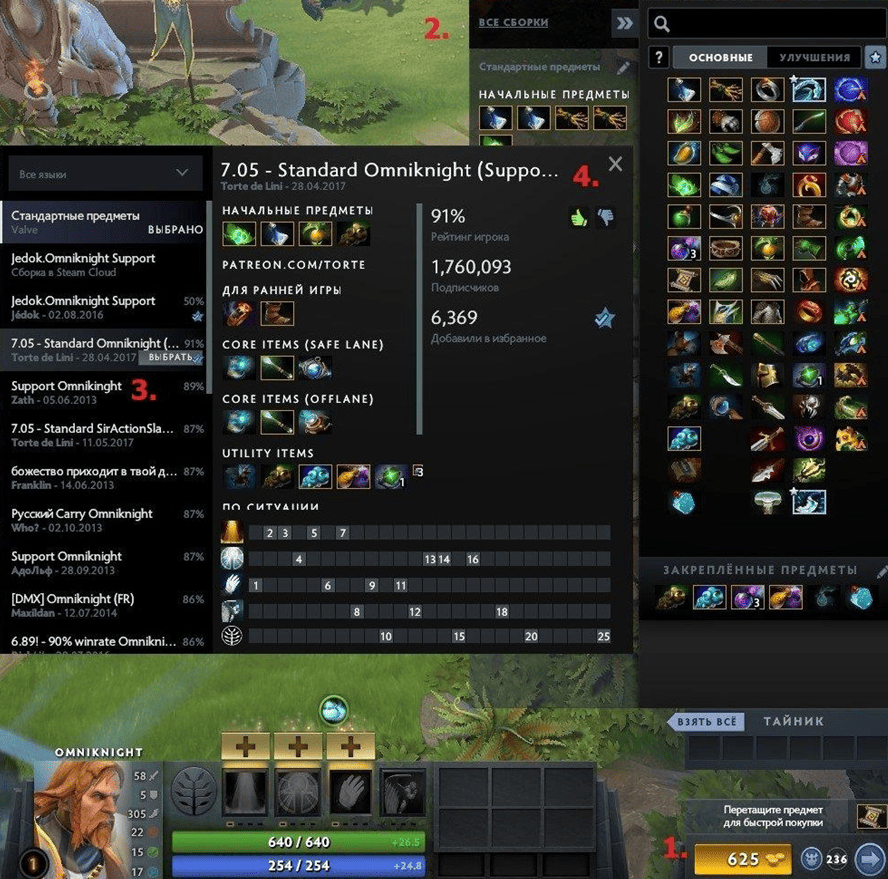
Using Guides Created by Other Players
As mentioned above, a good way to learn to make builds is to study guides published by the community first, including those from strong players. The most valuable ones are guides where the author explains why they pick certain items, how they combine them and why the abilities should be leveled in that particular order.
Other people's experience saves you from reinventing the wheel and from mistakes that are easy to avoid.
To use someone else's build, join any match and pick a hero. Then open the shop and click All Builds in the upper left corner. Choose the build that looks best for you from the list; to learn more about it, click View in the lower right corner of the screen.
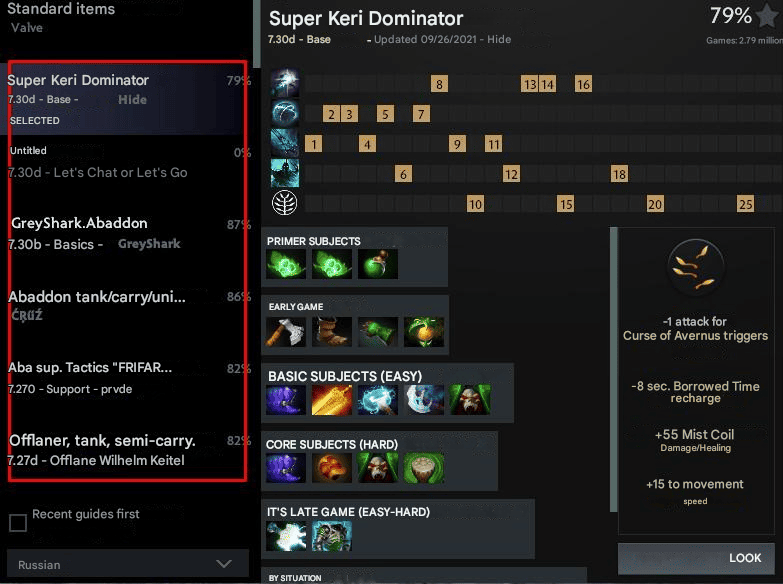
Look at the item combination, the description, the number of followers and the build's rating. Once you have decided, click Select. If you want to switch to another build later, simply repeat the same steps.
A solid build helps you win more often, which also means you can raise your MMR faster. And if you want your favorite hero to stand out visually too, our article on how to get skins in Dota 2 covers every option, and ready-made hero items are available on the LIS-SKINS Dota 2 market.
FAQ
How do I make my own build in Dota 2?
Open Heroes, then Guides, and click Create. Pick a hero, sort items by match stage, fill in the starting items, abilities and talents, and click Save.
How do I use my build in a match?
During hero selection, open the Guides tab and choose your build; it will be at the top of the list. During the match, you can do the same in the shop with the All Builds button.
How do I publish a build for other players?
After saving, click Publish. The guide will appear in the public list, where other players can select and rate it.
Do I have to pay to create a build?
No. The guide editor is built into Dota 2 and is free for every player and every hero.
